Tuesday, February 25, 2014

Pineapple Rasam - Pineapple soup - பைனாப்பிள் ரசம்

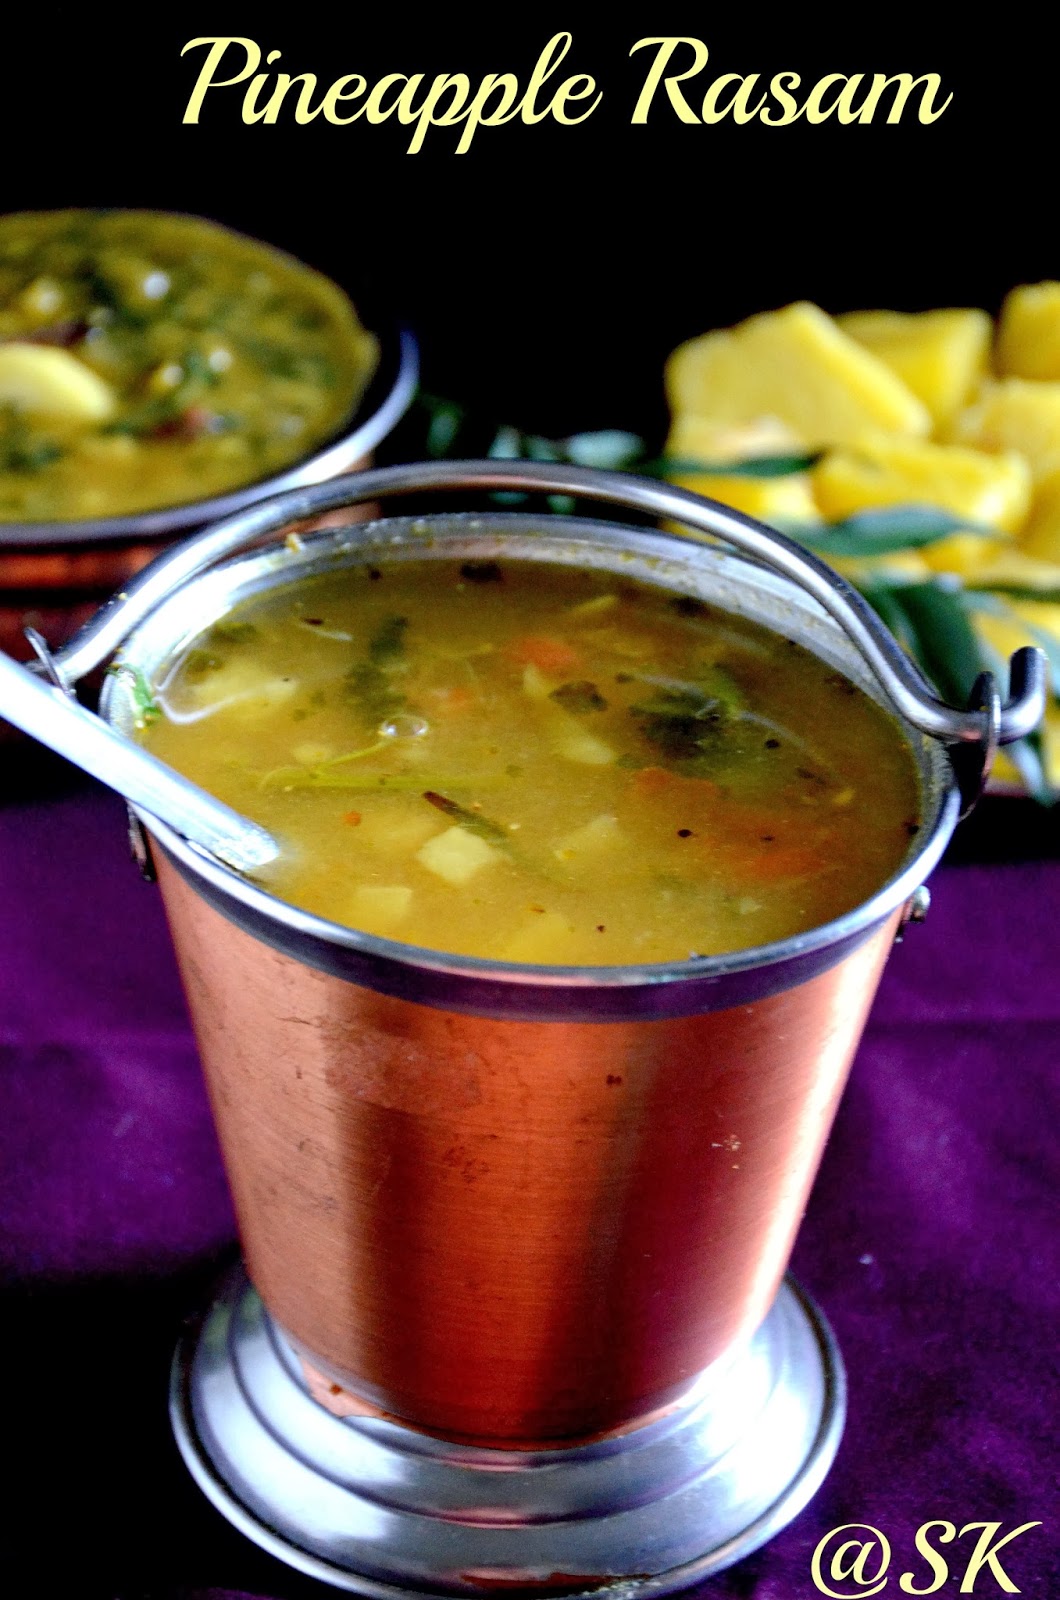
    Pineapple rasam is prepared using pineapple puree. Pineapple has a distinct flavour, it blends well in sweets or in daily cooking.  Recently, Rohith was asking for pineapple. So we bought a pineapple from Walmart. Unfortunately, it was not sweet enough. So he refused to eat it as such. Now I cannot see a full pineapple left un attended in my kitchen counter. I took the pineapple ,sliced them , reserved some in the fridge and the remaining got sealed in a ziploc ,went straight to the freezer. Prepared pineapple kesari and rasam using the pieces.The rasam was ultimate and couldn't keep it for so long.We finished the rasam soon.


Preparation time :           10 mins
Cooking time      :           10 mins
Serves                 :           6

Ingredients:
1. Toor dal              -          1/4 cup
2.Pineapple pieces  -           1/2 cup
3.Tomato                 -           1 small
4.Tamarind pulp      -           2 tbsp.
5.Pepper corns         -            1/2 tsp
6.Cumin seeds          -            1 tsp
7.Coriander seeds     -             1/2 tsp
8.Green chillies         -            1
9.Salt                         -             as needed
10.Cilantro                 -            hand full
11.Jaggery                  -             small piece
12. Water                    -            as needed

For tempering :
1.Oil                         -            1 tsp
2.Mustard seeds       -             1/4 tsp
3.Red chillies           -              2
4.Hing                      -               a pinch
5. Garlic pod             -               1
6.Curry leaves            -              few


 Method:
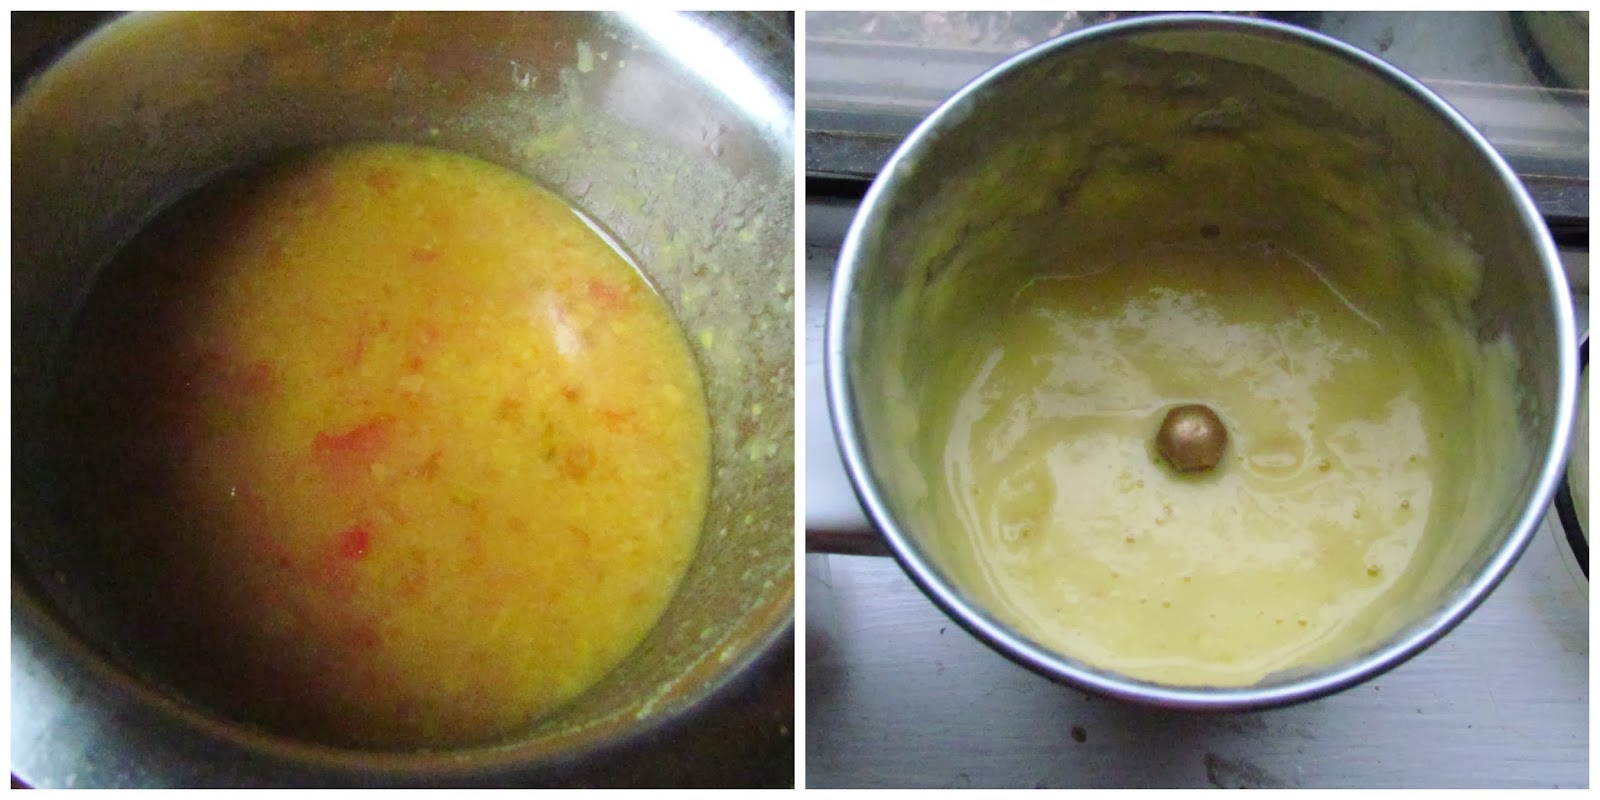
* Cook toor dal with a pinch of turmeric powder , hing and little oil. Oil makes the cooking faster. Mash the dal with the tomato and keep it aside.The tomato need not to be mashed well.Just a rough squeeze will be good. Take half of pineapple pieces in a blender and puree it. Reserve few pieces of tomato for tempering. 
 
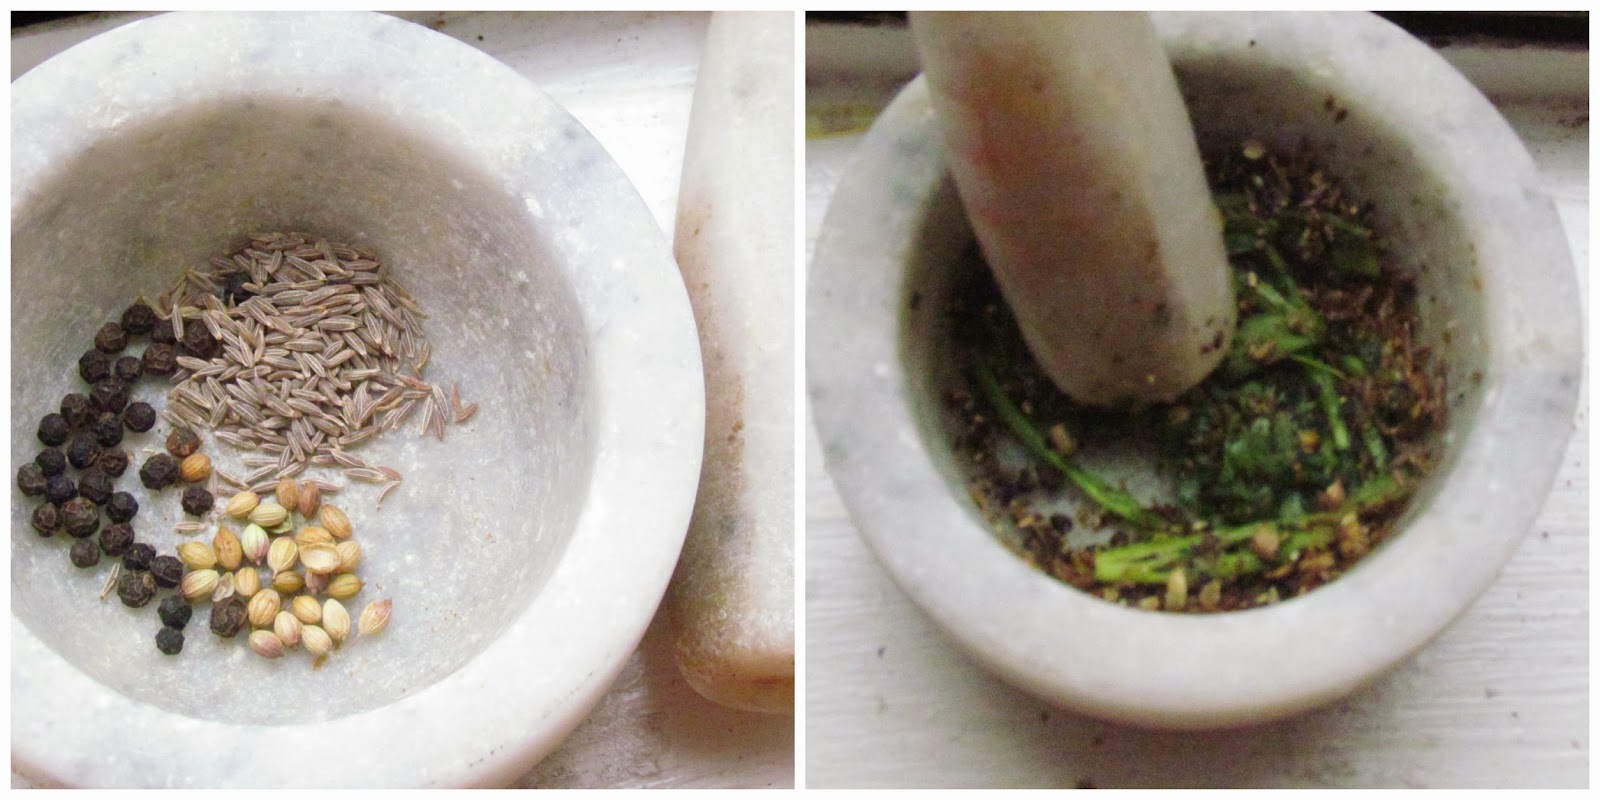
* In a  mortar and pestle, add pepper corns,cumin seeds,coriander seeds, cilantro stems, curry leaves and crush thenm roughly. We can alternately, pulse them in a belnder too.
 
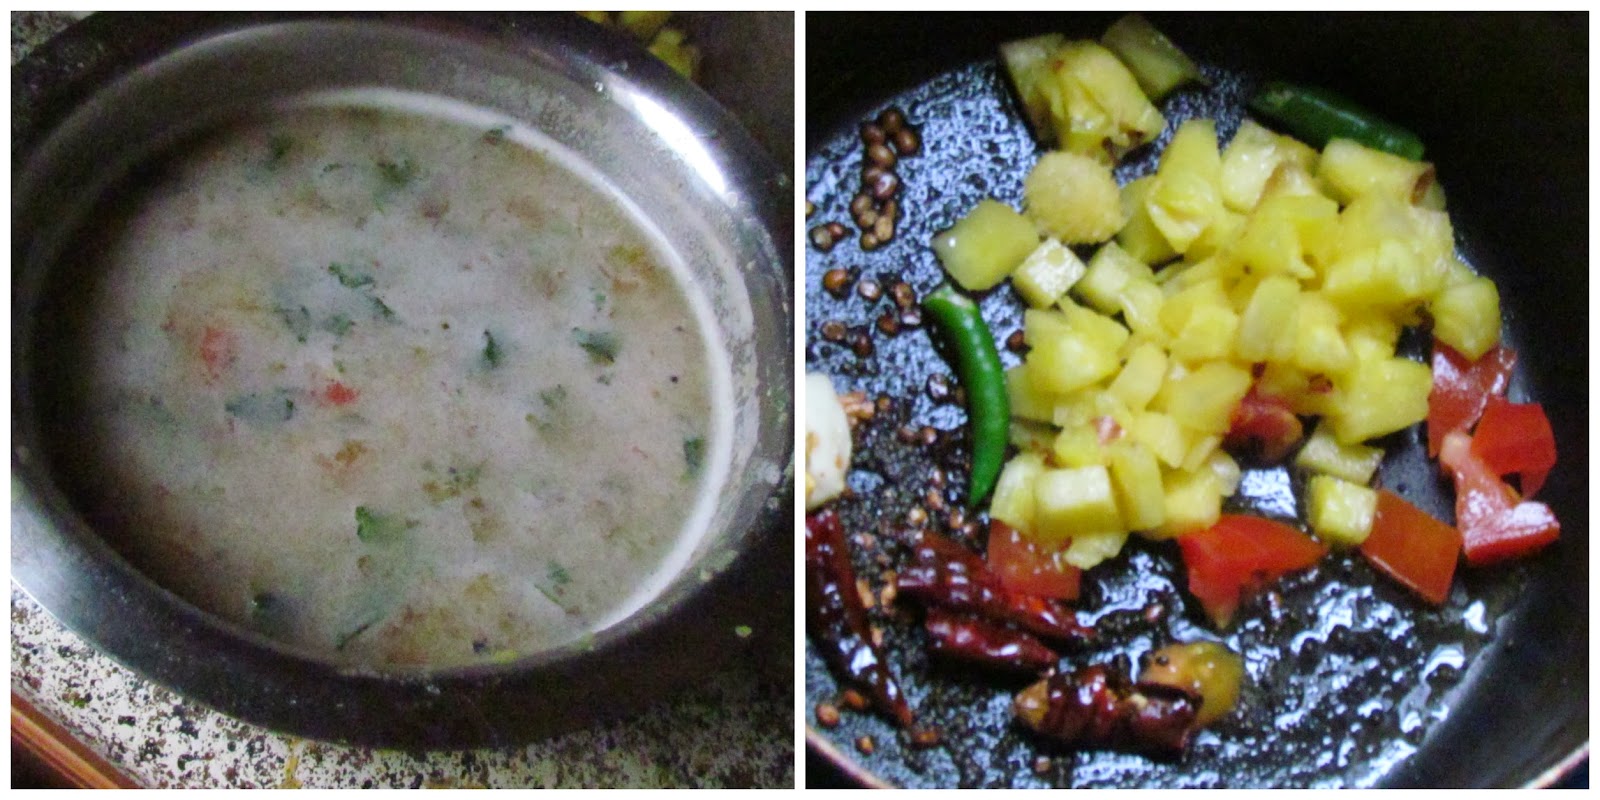
 * Now take the toor dal bowl, add the crushed masala, turmeric powder, tamarind pulp, water  and mix. Bring the rasam to the consistancy you want. But I prefer the rasam to be watery.Adjust salt to taste. Take another pan, add oil splutter with mustard seed,red chillies, crushed garlic pod, green chilli and hing. Now add the remaining tomato pieces and give it a mix. Add the chopped pineapple pieces to the pan, and saute little. 
 

* When the pineapple gives out nice aroma, add the rasam to the pan. When the rasam comes to a boil, add jaggery  , and some cilantro ,close the pan. Rasam has to be closed, till we use it. The aroma has to be sealed , if not rasam will lose its flavour. 
Notes:
* Taste the pineapple , if it too sour, then adjust the amount of tamarind and tomato.
* Don't boil the rasam too much, then it will lose its flavour.
* Adjust the amount of spices according to your taste.
* If you want, you can blend the tomato pieces in the blender along with the pineapple.
* Don't add too much toor dal, then the rasam will not have watery consistancy.

Linkin this to Nalini Suresh' s "Tamizhar Samayal Tuesday"


Thursday, February 20, 2014

Homemade Chocolate recipe - A guest post for Priya Suresh

        Priya Suresh is a pioneer in food blogging. Check her site "Priya's Versatile recipes " for innovative and interesting recipes. She is one great blogger, who co-ordinates with most of us. Whenever we see a challenge, she will be a  part of it. She is so humble, down to earth person. She conducts an event called "Rendez Vous - with a Foodie", which introduces two food blogger   every month on 7 th and 20 th. I got an opportunity this month.I have mentioned about her in her previous guest post . If you want to see what she has offered, check here. When I was searching her site to see , what she has not blogged about. I was stumbled to see ,that she has given almost all combinations. I was struggling to give her a new recipe. Finally decided to give this home made chocolate post. Check the recipe here.


         Last year  when I visited India, I grabbed some props and recipe books from"RMKV" Tirunelveli.One of the book is "Sweets" written by "Malliga Badrinath" - a famous South Indian cooking icon. In that book, this simple to make chocolate recipe inspired me . So prepare the chocolates using milk powder and cocoa powder. This is easy to make ,but care should be taken while preparing the syrup. If the syrup doesn't form single thread ,then the chocolate will not set properly. Sifting both milk powder and cocoa powder is necessary, so that we don't get any lumps.


    The butter gives a shiny texture to the chocolate.We can mould the chocolates in n number of ways. We can use different moulds to prepare . I just used a loaf pan to prepare the chocolate.We can use any nuts or raisins of our choice and add it to the chocolate. These chocolates stay fresh for almost 10 days on the counter, if it is stored in air tight container. 


Sunday, February 16, 2014

Linzer Cookies - Baking Partner Challenge - Step by step

    Linzer cookies are  like shortbread cookies, that are sandwiched together using jam. This tastes so good and easy to follow. I used almond paste to the dough. We can use almond meal or hazelnut powder instead. When I made these cookies , it was snowing lightly in Irving. Crazy blogger mind, asked me to take picture on snow. It was around - 6 degrees F. After taking few shots, I cannot feel my hand, it was that frozen. But completely happy with the outcome. Nature is beautifull on it own.I just made 10 cookies, by quartering the recipe. It got vanished in a minute. The zest of orange and lemon makes the cookies so aromatic. The cold butter makes the cookies melt in your mouth.These are so delicate, so take care not to overbake the cookies, if not it will change colour immediately.


Ingredients:


Yield :  40  2 inch  cookies

  1. 1  cup 2 tablespoon  (5.06 ounces)/145g unbleached all-purpose flour
  2. 1/2 cup (2.5 ounces) 63g  ground almonds and/or hazelnuts
  3. 1/4 cup (1.75 ounces)/50g granulated sugar
  4. 1/8 teaspoon salt
  5. 1 1/4 teaspoons ground cinnamon
  6. 1/8 teaspoon ground cloves
  7. 8 tablespoon of  unsalted butter
  8. 1/8 teaspoon almond extract
  9. 1 teaspoon grated lemon zest or 1/4 teaspoon lemon extract
  10. 1 teaspoon grated orange zest or 1/4 teaspoon orange extract
  11. Strained or pureed good quality preserves or fruit spread
  12. 1 teaspoon + extra Powdered sugar for dusting 


Method:
* Blanch the alonds. That is, put the almonds in hot water and leave it aside for 10 to 20 minutes. The skin will come off. I just microwaved the almonds in a bowl of water for 20 seconds and kept it aside for 10 minutes. The skin peeled easily. We can follow either way. Place the almonds on paper towel, so that the moisture is absorbed. Then powder it with some powder sugar and grind it to fine powder without any lumps. My alonds had some moisture, so I made a fine paste with the almonds.

* Take a mixing bowl, add all the ingredients with almond paste. The butte has to be cold. Just cut the butter into tiny cubes and add. 


* First knead the mixture into a crumble. Then  knead it to a soft dough. Since I quatered the recipe, I just kneaded using my hands. If you are going to make bigger batch, then use a stand mixer with dough hook.

* Cover the dough using a cling wrap . Refrigerate for atleast 2 hours. We can refrigerate the dough for upto 3 days.

* Pre heat the oven for 325 degrees Farenhiet.Take the dough outside . Flour the working surface with flour. Roll the dough into a sheet of 1/4 thickness . Dip the cutter in flour and cut it into heart shape cookies.Cut some cookies in the middle using small heart cookie  cutter.

* Place the cookies on a baking sheet . It will be bit tricky to transfer the cookies without any crack. So use a thin spatula to do the job.Since this has butter in it, no need to grease the pan. Leave equal space between cookies.

* Bake for about 12 - 15 minutes or untill the edges become golden brown. Don't overbake the cookies, as they tend to blacken quickly. When they are still warm, transfer the cookies to wire rack and cool it. When the cookies are cooled, sprinkle it with powdered sugar.

* Spread jam on the lower cookie and place another cookie on top. Store in air tight containers. Since the cookie has jam in it, it will moisten the cookie soon. So try to finish the cookie soon.

Notes:
* We can also use almond meal.
* We can also substitute all purpose flour with unbleached flour.
* Any preserve or filling works great.
* Take care while baking, as the cookies tend to change colour wuickly.
* At first the cookie may appear soft, but it becomes hard after cooling.
* If you find difficult to roll the dough, just keep the dough between 2 parchment paper and roll.
* Roll the dough quickly, if not the butter in the dough may make it become soft .

Linking this to Swathi Iyer' s Baking Partner's Challenge 

Thursday, February 13, 2014

Homemade Granola Bar - No bake Version - Step by step

   This month Saranya of  "Just not the  cakes " space, suggested a variety of goodies to try for Home bakers challenge. I picked granola bars. Because this was in my to do list for so long. I didn't want to miss this time. When  I checked the recipe, I saw eggs in it. So I didn't want to add egg to the bars. So searched the web and got this recipe. It is a no bake version. Yes you heard it right. The granola mixture is popped into the fridge and set for about 2 hours. Then it is sliced. This recipe is a hooker and you could not have just one. This is kids friendly too, as it has lot of nuts and dry fruits. I halved the recipe and altered it according to my taste. I was short of almonds and butter. So I replased it with cashews ,peanuts and ghee. Yeah, I used ghee and my house was filled with the aroma of ghee. I am going to bake it regularly in my kitchen. H takes these bars as his break fast too :) If he approves , then its sure a victory for me.

Recipe Source             :      here
Preparation time          :      10 minutes
Setting time                  :      2 hours
Yields                          :       10 medium thicknessed bars

Ingredients:
1.Instant Oats               -        1 1/4 cup
2.Cashews                   -         2 tbsp
3.Peanuts                     -          2 tbsp
4.Honey                       -         3 tbsp
5.Butter                        -          2 tbsp
6.Brown sugar              -         2 tbsp
7.Vanilla essence         -          1/2 tsp
8.Salt                            -          1/4 tsp
9.Dried cranberries      -          2 tbsp
10.Chocolate chips       -          2 tbsp + 1 tsp 
11.Oil                           -           for greasing


Method:
* Take a square 8 inch pan and wrap it with aluminium foil. Apply little oil on the foil.

* Now dump in the instant oats and nuts to the pan.Original recipe called for 1/4 cup of almonds.I ran out of almonds.So I  have used cashews and peanuts 2 tbsp each. You can replace the nuts with whichever you prefer. 
* We can either roast the oats and nuts on a stove top or toss it in the oven @350 degrees Farenhiet for 10 minutes. Mix it now and then. I used my oven to roast the oats and nuts.Now Take a bowl, add butter,honey,brown sugar , salt and mix it.Since I didn't have butter, replaced it with ghee.
* Keep it on a stove and cook till the sugar has melted or when it starts boiling turn off the stove.

* Now dump the roasted oats,nuts chocolate chips ,vanilla and dried cranberries. We can also substitute raisins instead of cranberries. Since the liquid is still warm, the chocolate chips may melt a bit.Don't worry, this will help the bars to become firm.

* Mix with a spatula and dump it into the  pan with foil, which was greased again with oil.If we don't grease it again with oil, then our bars will stick to the foil and it will be difficult to take it off. Wet your hands and press the mixture to the pan well. Top it with remaining chocolate chips and press them bit, so that they don't come out.
* Cover the pan with a cling wrap .Refrigerate for atleast 2 hours.Once they are set, take it out of the refirgerator and leave it for 5 minutes.
 * Using a sharp knife, cut the granola bars into small rectangles and store it in air tight container. The bars stay fresh about 1 week on the counter top. We can also crumble the bars and add it to the milk and have as break fast. This will be similar to our cereals.

Notes :
* We can use rolled oats instead of instant oats . If you are using rolled oats , then reduce the honey to 2 tbsp. 
* Don't leave the granola for more than 2 hours, then it will become hard.
* If you are going to toast the oats and nuts on a stove top, then make sure it doesn't change colour.
* Store the bars in air tight containers.


Linking this to Priya Suresh's " Home baker's Challenge"

Tuesday, February 11, 2014

Kumbakonam Kadappa - கும்பகோணம் கடப்பா - Side dish for idli,dosai and chapathi

       Kadappa is a very famous side dish for idli dosai or chapathi. This  recipe has its origin from "Kumbakonam", besides coffee and brass vessels. My H's aunt is from that surrounding. She prepares very tasty kadappa. When we were newly married, she visited our house once. My H asked to prepare this kadappa, to show me the taste. She prepared this kadappa for chapathi. It was too good. I totally forgot the recipe. Now when I went for vacation,got the recipe from my MIL and noted down. I prepared it ,when  returned to Dallas. It tasted too good. Traditionally, kadappa is prepared without adding potatoes. But I added it to make it for rotis. The magic ingredient is "Poppy seeds". This gives out a nice aroma and makes the curry thick. So don't skip this in the curry. Try this kadappa and let me know the feedback.


Ingredients:
0.Tomatoes              -       1 big or 2 small
1.Boiled Potatoes     -      1
2.Onion                    -      1/2
3.Garlic pods           -       2
4.Chilli powder       -        1 tsp
5.Turmeric pwdr     -        1/4 tsp
6.Fennel seeds         -        1/2 tsp
7.Cinnamon             -        1/2 inch
8.Cloves                   -        2 or 3
9.Curry leaves          -        few
10.Poppy seeds        -        1/2 tsp
11.Salt                      -        to taste
12.Water                  -        as required
13.Oil                      -        2 tbsp
14.Cilantro               -        hand full
15.Roasted gram       -        1 tbsp. (pottukadalai)
 
To roast and grind:
1.Ccconut     pieces  -        3
2.Green chillies        -        2
3.Ginger                   -         1/2 inch
4.Garlic                    -         1/2
 
Method:
* Take a pan, add water and bring it to boil. When the water comes to boil, dump in the tomatoes. Close the pan with a lid. This will make the tomatoes to peel off its skin. Peel the skin of the tomatoes  and puree them well. Soak the poppy seeds with a tbsp. of hot water .Leave it for atleast 10 minutes. 
* Take a pan, add little oil, sauté the green chilli, ginger, coconut pieces, garlic pod ,till it is golden brown. Let it cool. Now add all the roasted ingredients with soaked poppy seeds and roasted gram (pottukadalai)  to a blender and grind it finely. Add very little water while grinding.
 
*Take a motor and pestle and crush the fennel seeds, cloves, cinnamon  coarsely. Now in a pan, add the remaining oil  and splutter the crushed whole garam masalas,curry leaves and crushed garlic pod. When they are roasted well, add sliced onion and sauté till it turns golden brown. Sprinkle little salt in between. 
 
* When the onions are cooked, add turmeric powder,chilli powder and give it a stir. Let the raw smell leaves ,now dump the pureed tomato to the pan. Sprinkle little salt and mix. 
 
* When the tomatoes are cooked,  add the grinded paste to the pan. Mix it well. Adust salt to taste. Add water to the consistency we need.Kadappa should not be too thick or too thin.My curry was bit thick, as my H loves that way. You adjust it by adding water to the curry. At last add cubed and boiled potato to the curry. Let it cook in medium flame. Finally garnish with cilantro. 
 
 Kadappa is served with idli, dosai or chapathi. 
 
Notes:
* Don't add too much of poppy seeds, then the curry will become too thick.
* Adding potatoes is optional.
* Adjust the spice level according to your taste.
* Poppy seeds gives a unique aroma and thickness to the curry. So don't skip it.
* Tomatoes can be pureed, but kadappa should not have any pieces of uncooked tomatoes, that is the reason, we blanch  and puree it.
  
 
Linking this to "Nalini Suresh's "Tamizhar Samayal Tuesday"


Thursday, February 6, 2014

Broccoli Sandwich - Iron rich breakfast for kids - step by step

   Broccoli is my family's favourite vege. Rohith and Ashwath love it a lot. I love to sneak the vege in wherever possible. Today tried this easy and quick sandwich for breakfast. I t was creamy and yumm. Broccoli is rich in iron. So try to sneak this in your diet .It helps to lower the cholesterol level in your blood, when it is steamed. Planning to post some dishes using broccoli. Try this simple broccoli stir fry.
 
 
Ingredients:
1.Whole wheat bread         -        2 slices
2.Broccoli                          -         1/2 cup
3.Cheese                             -         1/2 cup
4.Milk                                 -          2 tbsp
5.Salt                                   -          as per taste
6,Pepper powder                 -          as per taste
7.Garlic pods                       -          1
8.Butter                                -          1 tsp
9.Oil                                     -           1 tsp


Method:
* Spread butter on the bread slices. Keep them ready. Take a pan, add little butter and oil.Drop the crushed garlic pods and sauté. Now dump in the washed broccoli and sauté it, till it is soft.


* Now add cheese, salt and pepper. Turn the flame to low, as the cheese will melt and stick to the pan. At this point, broccoli should have cooked well. If not sprinkle some water .


* Now add some milk to the pan. This will help us to collect the cheese, which got stick to the pan. Now make the broccoli as spreadable. That it should not be runny. Turn the flame off.


* When the spread is cooled, spoon the filling on the bread.Close it with the other bread.


* Now grill the sandwich , till it turns golden brown. Tada, your breakfast ready. Its full of  iron.

 
Slice and serve with ketchup and enjoy!!!


You might also like

Related Posts Plugin for WordPress, Blogger...