Friday, January 31, 2014

Garden Vegetable Strudel - IFC

 Vegetable strudel is nothing but, a roll of phyllo dough filled with roasted vegetables.It can be either served with soup or plain. Kids will enjoy this, as the flavor is very mild and tasty. Vegetable lovers will go gaga over these strudel.This strudel is an authentic food of Austria.
  
Serves:        5 to 6     

 Ingredients:
1.Phyllo sheets           -          6
2.Carrot                      -           1
3.Beans                      -           5
4.Potato                     -            1
5.Peas                        -             1/4 cup
6.Paneer                     -            2 tbsp.
7.Brocolli                   -            1/4 cup
8.Basil                        -             1/4 tsp
9.Salt                          -             as needed
10.Pepper powder      -             as needed 
11.Oil                         -             2 tbsp.
12.Butter                    -             2 tbsp.
 
 
Method:
* Cut the veges and boil them except broccoli. Take a pan , add oil and sauté the broccoli first. when it is sautéed well, add the other cooked vegetables and toss it. 
 
* Turn the stove off.Now add the paneer,basil,pepper powder and salt and give it a stir.


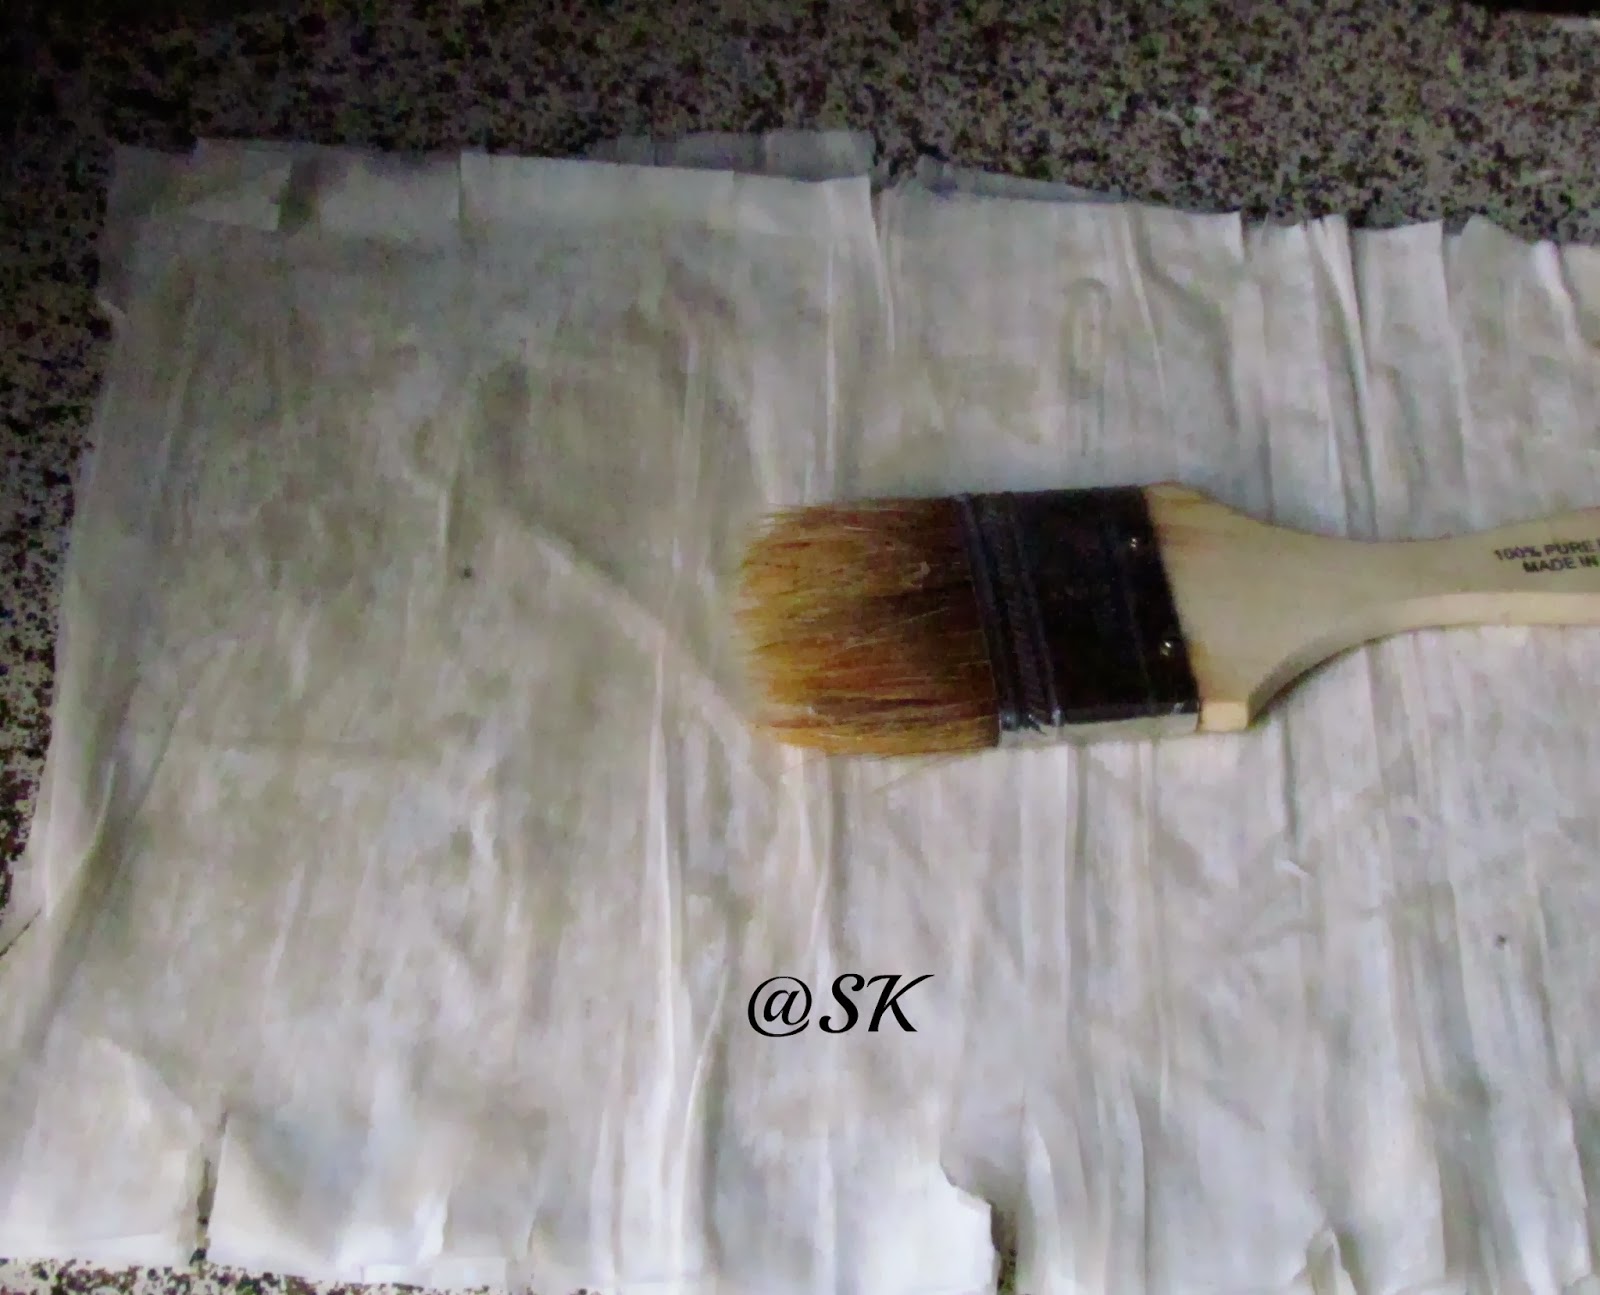
* Thaw the phyllo sheets as per the instruction given in the box. Spread the sheets on the kitchen counter.Brush it with butter. Brush all the sheets with butter.
Now spread the vegetables on top of the sheet, leaving , half inch space in all the sides.

 
 * From the short side, roll the phyllo sheets tightly.


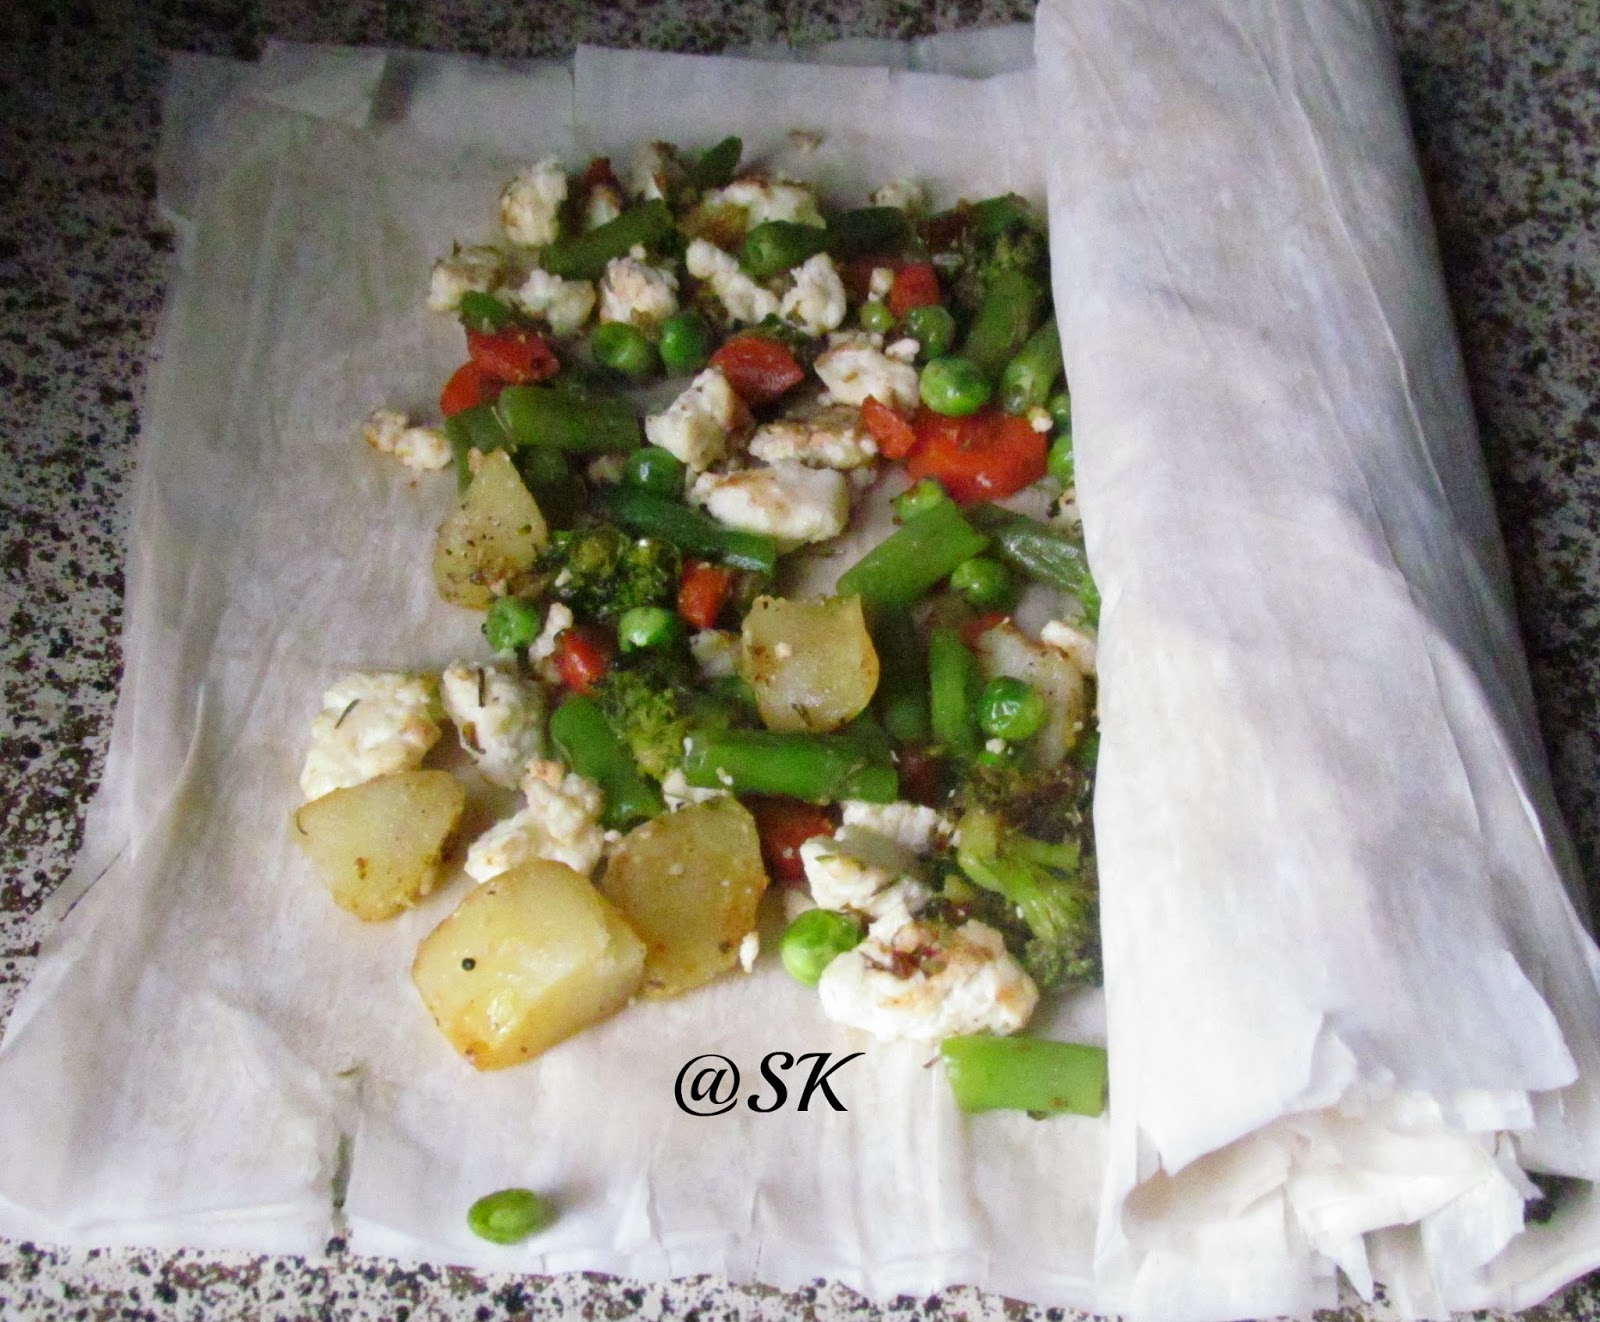
* Place the roll on a pan, seam side down.Take a knife, slash the roll in 4 or 5 places. Brush the outer layer with butter.

* Pre heat the oven at 350 degrees Farenhiet. Place the strudel in the oven and cook for atleast 25- 30 minutes or until it has golden brown spots on top. Trim both the ends of the strudel.Slice the strudel and enjoy with soup.
Notes:
* We can whatever vegetables we like;
* Thaw the phyllo sheets well, if not it will get torned.
* Original recipe called for cheese, I replaced it with paneer.
* We can also roll the strudel from long side.


 Linking this to :International Food Challenge" started by Saraswathi Tharagaram and Shobana Sekar.
 

Thursday, January 30, 2014

Chicken biriyani using rice cooker - Step by step

 Cooking biriyani will always be tricky in getting right textured rice. When we use pressure cooker, we should be very carefull about the number of whistle we have to keep it for. This fear can be eliminated by using rice cooker. Rice cooker cooks evenly and fast. Just prepare the masala and transfer it to the rice cooker with rice and chicken stalk. Your chicken biriyani is ready within 25 minutes. Check my other chicken biriyani recipe using pressure cooker here
 
Serves                      : 3
Preparation time    : 25 minutes
Cooking time          :  40 minutes
 
 
Ingredients:
For the chicken stalk:
1.Chicken cubes                  -       4 to 5
2.Pepper corns                     -        few
3.Cilantro stems                   -        few
4.Onion cubes                      -        few 
5.Small ginger piece            -         1
6.Water                                -          3 cups
 
For biriyani:
1.Chicken                            -         1 lb
2.Basmati rice                     -          2 cups
3.Onion                               -          1 (big)
4.Tomato                             -          1 (big)
5.Ginger garlic paste           -           1/2 tsp
6.Green chillies                   -            2
7.Curd                                  -            1/2 cup
8.Chilli pwdr                        -            3/4 tsp
9.Turmeric powder               -            1/4 tsp
10.Salt                                   -            as required
11.Mint leaves                       -            hand full
12.Cilantro                             -            hand full
13. Chicken stalk                   -            3 cups
 
For tempering:
1.Oil                                       -            1/4 cup
2.Ghee                                    -            2 tbsp.
3.Cinnamon sticks                  -            1/2 inch
4.Cloves                                  -            4 to 5
5.Bay leaf                                -             1
6.Fennel seeds                         -             1/2 tsp
7.Cardamom                            -              4
   
Method:
* Take a pressure pan, add chicken stalk ingredients and cook for 2 whistles. When the pressure subsides, strain the chicken stalk and discard the chicken pieces.Reserve this stalk for the biriyani. We can prepare this stalk 2 to 3 days ahead and refrigerate. We can also freeze this for atleast few months.

 
* Soak   basmati rice for atleast 20 minutes and drain it completely for 10 minutes. Take chicken pieces , wash them atleast for 4 times ,till it looses all its raw smell. Now add some curd and turmeric powder to the chicken and marinate for atleast 10 minutes in the refrigerator.
 
 * Take a pan, add ghee and oil. when they are hot, add the whole garam masalas and let them splutter. This is essential in getting a flavourfull biriyani. Now add the sliced onions and green chillies. Let the onions  turn golden brown. We can speed up the process by adding little salt.
 
 * Now add ginger garlic paste and sauté it, till it looses its raw smell. Now add chilli powder to the masala. Be carefull not to burn the chilli powder.
 
 * When the chilli powder is blended, add the chopped tomato and sprinkle some salt. when the tomato gets disintergrated, add the chopped mint leaves and cook.
 
* Now add beated curd to the pan and mix it. At last add the marinated chicken and let it get coated with the masalas. Cook the chicken for 3 to 4 minutes or until it is half cooked.
 
* Now add the soaked basmati rice to the pan. If we want, we can fry the basmati rice separately, before starting the biriyani process and keep it aside. Since I didn't had time, I fried the rice along with the chicken masala. Take care not to break the rice. Once the rice is fried, transfer the contents to the rice cooker.
 
 * Now pour the chicken stalk to the rice cooker and adust salt now. Close the rice cooker and turn it on. The rice will be cooked within 20 minutes. Once the rice cooker turns off, carefully transfer the biriyani to another bowl. This helps the biriyani to retain its texture, if not the rice will stick to each other.
 
 
Garnish with chopped cilantro and serve  with raita and egg. 
 
 
 Notes:
* If we don't have chicken stalk, then replace it with plain water.
* We can also marinate the chicken with red chilli powder and refrigerate it over night.
* Take care not to break the rice ,while frying.
* Transfer the biriyani to another bowl immediately, if not the rice will stick to one another.
* My rice cooked in 3 cups of stalk. You can increase the stalk to 1/2 cup more depending upon your rice. 
 

Tuesday, January 28, 2014

Rava Pongal - ரவா பொங்கல் - step by step

Are you like me, who always want different variety in everything?. Then this is for you. I get bored soon, if I prepare the same kind of food every day. But my H is directly opposite to me. ( This is called opposite poles attract each other :) ) He wants a routine in everything. So whenever I get a chance to cook for myself, I steal some time and make the food ,which I like.I came to know about this pongal, when my sister used to prepare this for her son. She always says about this pongal, but I didn't had time to try it. But when I started preparing this, I fell in love. This tastes too good. It has the texture of both pongal and upma. A different dish to try . I am sure, it won't fool you.   
Ingredients:
1.Rava / Semolina           -         1 cup
2.Moong dal                    -          1/4 cup
3.Water                            -          1  to  1 1/2 cups
4.Pepper corns                 -          1/2 tsp
5.Cumin seeds                 -           1/2 tsp
6.Curry leaves                  -           few
7.Ginger                           -          a small piece
8.Hing                              -          a pinch
9.Salt                                -          as needed.
10.Cashews                      -          1 tbsp
11.Ghee                            -          1 tbsp 
12.Oil                               -           2 tbsp.
13.Turmeric powder        -           a pinch


Method: 
* Wash the moong dal, add a pinch of turmeric powder  and cook till it wilts. Strain the water from the dal. We can use to cook the pongal later.
* Take a pan, add little oil and fry the cashews till golden brown. Strain the cashews and take it aside.
* In the same pan , roast the rava till it turns golden brown or till it gives out nice aroma. Keep it aside.

 
* In the same pan, add the remaining oil and splutter with pepper,cumin seeds,curry leaves,hing and little crushed ginger.

* Now we have 1 cup of strained water from the dal. Mix it with water ,so totally I took 2 1/2 cup of water. I wanted my pongal to be little loose. But if you want to make it little hard, then decrease the water level. Now add salt to our taste.
* Now turn the flame to low, add the roasted rava little by little. It should not be lumpy, that's why , we are adding slowly . Rava should be cooked well.
* Now add the cooked dal and mix. Don't mix it too hard, then the dal will disintergrate.
* Now add a dallop of ghee and mix it well. Close the pan and keep it in dhum for a minute and turn the stove off. Next if you want, heat a tbsp. of oil and pour it over the pongal. This hot oil makes the pongal to slide it to your mouth. If you don't want oil, then skip this step. Garnish with cashews.

 
Serve rava pongal with chutney or sambar. Rava pongal tastes best, when it is hot.

Notes:
* We can also add ghee and fry the cashews.
* Roasting rava is a must , if not the texture will not be good for the pongal.
* If we want little spicy, then we can add one green chillie crushed.
* Moong dal should not be cooked  to mushy.
* If you want the pongal to be little hard, then decrease the water level to 2 0r 21/4 cups.
Linking this to "Tamizhar samayal Tuesday" started by "Nalini's Kitchen".


Wednesday, January 22, 2014

Cream Au Chocolate - Baked chocolate - Step by step - HBC

    Home baker's challenge, gave us French recipes this month. Among the recipes , I picked this baked chocolate , as my son is a chocolate lover. This is very easy recipe and should have the chocolate within 1 day, if not it may loose its creamy texture. Priya of "Priya's Versatile recipes" gave us this month challenge. The sugar level was not enough for me ,so increase the sugar level according to your taste. This dessert is a party pleaser too.
 
 
Recipe Source: http://cuisine-facile.com/desserts/recette-creme-chocolat.html
Ingredients:
100 grms Dark chocolate (chopped roughly)
3nos Egg yolks
1cup Fresh cream
1/2cup Milk
2tbsp Powdered sugar  or according to your taste.


Method:
 
* Take the milk,cream in a vessel and bring it to boil.

*Once they starts boiling remove it from the flame and add in the chocolate.


* Stir it until the chocolate gets well melted. 
 
 
* Meanwhile in a bowl, beat the egg yolks with sugar.
Slowly add the chocolate cream mixture to the egg yolk mixture and beat until they gets well mixed.

* Strain this mixture and pour it in ramekins or else in small bowls (which fits for baking)
Preheat the oven to 340F.
Bring boil 2cups of water in a vessel, pour this hot water in a tray and place the ramekin in it.
Bake for 30-35minutes.


* Let it cool completely, wrap it and place in fridge for atleast two hours.
Enjoy this cream with some whipped cream or else with some caramel bites.
 
 
Notes:
* You may see the creme not cooked in the center after baking, dont worry they will turn hard once they gets chilled.
* Don't bake this cream more than 30-35minutes, else they will get harden later and wont taste good.
* Egg yolks need to be at room temperature.
* You can add sugar more or less as per your need.
Linking this to "Home baker's Challenge" created by Priya Suresh.
 

Sunday, January 19, 2014

Tandoori Aloo Wrap - The Wrapped goodness - Step by step

   Tarla Dalal , is a cooking icon, who left us few months back. Her recipes are simple, elegant and unique. I started reading her recipes, very recently. Loved all her creations to the core. This was one of the recipes in her cooking site. When I came through this recipe, it pulled my attention immediately and I made it the same evening.
   Some days Ramesh will be out for some business meets or casual parties. I used to cook, what my palate calls for that day. It can be a simple "spinach curry" or a pepper rice or simple "dal fry". Isn't it so happy to cook, what our tummy calls for? It was one of those days, where Ramesh went for a casual party with his collegues. I made this tandoori aloo wrap and indulged in its taste. Just made 2 wraps, it was filling for me. The wrap has sharp spicyness from the red chillies , chilled curd dressing gives a moistness to the wrap. It was a completely new taste for me. But worth the effort. We can make the filling and curd dressing day ahead . When we are about to assemble, just cook the rotis and fill the rest of the ingredients. 
Ingredients:
For the tandoori aloo:
1.Boiled potato          -       1 (big)
2.Kashmiri Red chillies  -       3
3.Garlic  pods            -        2
4.Cumin powder        -        1/2 tsp
5.Kasoori methi         -         1/4 tsp
6.Cream                     -         2 tbsp
7.Salt                         -          as needed
8.Oil                          -           1 tbsp.
 
For the roti:
1.Wheat flour           -          1/2 cup
2.Salt                        -           as needed
3.Water                     -           as needed
 
For the curd dressing:
1.Whisked curd          -         1/4 cup
2.Chopped garlic        -         1 tsp
3.Chopped  cilantro    -          1 tsp
4.Salt                           -         a pinch
5.Sugar                        -         a pinch
6.Milk                         -           1 tbsp
7.Cumin powder          -         1 tsp
 
For garnishing:
1.Sliced carrots        -      1/4 cup
2.Sliced onions        -       few
  
 
 Method:
Preparing the roti:
 * Take a mixing bowl, add flour,salt and mix it well. Add water little by little and from a loose dough.Let it rese for a while.Mean while, boil potato with a little turmeric powder.
* Divide the dough into equal sized balls. Roll it into a thin roti. Now cook the roti on a tawa. Cook till the roti gets bubbles on both the sides. Don't over cook the rotis , then it will become crisp. don't add any oil. Keep it aside.
 
Preparing the filling:
* Take a blender and grind red chillies with garlic pods.Make it a fine paste. If you want, can sprinkle little water.
 
* Cut the boiled potato into small cubes. Take a pan, add oil , sauté the potatoes ,for a while.

* Now add the grinded paste to the potato and mix it. Cook till it looses its raw smell.

* When the masala is cooked, add cumin powder and mix it.

* Now add the cream and mix it.

* At last add slat and kasoori methi and blend them with the potatoes.Cool the filling completely.


Curd dressing: 
* The dressing can be prepared by mixing, whisked curd, chopped garlic,chopped cilantro,cumin powder,sugar ,salt and milk. Mix them well, till it blends.
 
 
Assembling the wrap:
* Take the rotis and slightlu heat them over a tawa. .Take a plate, place the roti .

* scoop some tandoori aloo and place it on the roti.

* Place some sliced carrots and sliced onions on top. We can also use some sliced cabbage.

* Drizzle some curd dressing on top of the wrap.(Sorry for the blurred picture, I am still working on my new SLR. )


* Fold the roti tightly and pin it using a tooth pick. cover one end with aluminium foil.

Serve with some ketchup. This wrap stays moist for atleast 2 hours because of the dressing. 


Notes:
* If we don't have cream ,we can just add milk for the aloo.
* sliced cabbage can be replaced with the onions.
* We can make the filling and the dressing on eday ahead. Just cook the roti and assemble the wrap , the day we want.
* I didn't had Kashmiri chillies. So substituted with regular red chillies. If you use Kashmiri chillies, it will give a good red colour.

You might also like

Related Posts Plugin for WordPress, Blogger...